
Getting started with LuaCAD
LuaCAD adds building-services modules to your CAD: piping in 3D and 2D, ventilation, drainage, openings, underfloor heating, blocks and annotation. This page shows where to find everything and how to start a project.
The welcome window
After starting, the Welcome to LuaCAD window appears. It offers the four most common ways to begin – each has an "i" with a short explanation.
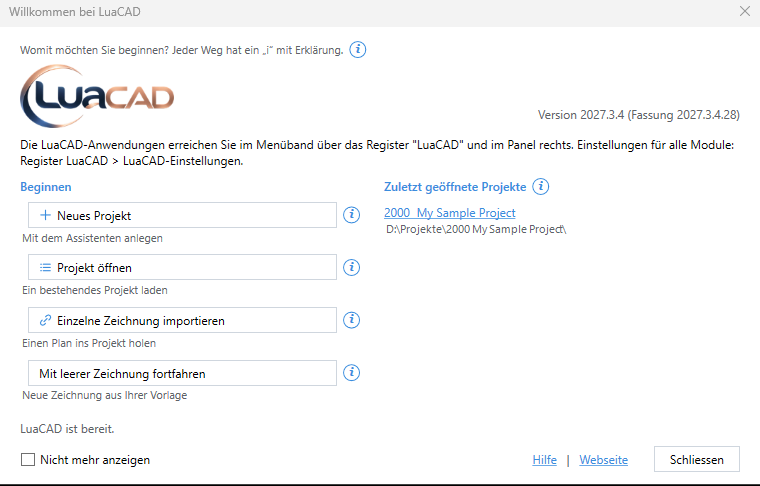
- New project – starts the project wizard (see Creating a project).
- Open project – choose the project file of an existing project; it appears in the project panel.
- Import a single drawing – brings a plan (DWG/DXF) into a project as a drawing; afterwards you set the origin and the scale.
- Continue with an empty drawing – a new drawing from your template.
- Recently opened projects – one click loads the project.
The LuaCAD ribbon tab
All modules are on the ribbon tab LuaCAD. On the Home tab, the LuaCAD button at the far left takes you there directly.
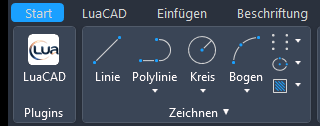

- Modules – one click opens the panel of the module (Piping 3D, Piping 2D, Ventilation 3D, Drainage 3D, Underfloor heating, Openings, Block catalog, Annotation).
- Project – project panel, new project, import drawing, project backup.
- Exchange – IFC import and IFC export.
- Info – LuaCAD settings, check for updates, website, this help, support and version information.
The panel
Each module works in a panel at the edge of the drawing. When several modules are open, switch between them with the vertical tabs on the left.
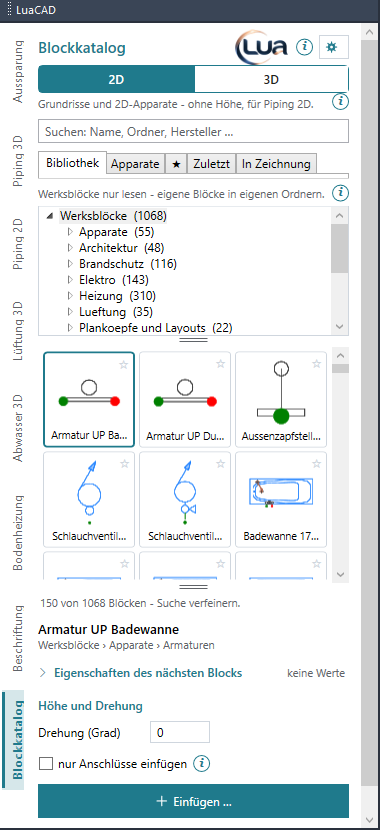
- Module tabs – a click shows the panel of that module.
- Module name, below it the pages of the panel.
- "i" – explains the page that is open; "More in the online help" below leads here.
- Gear – module settings, layers, help, info and "Getting started".
The first time you open a page, a Getting started card next to the panel explains it field by field. Next walks through the steps; gear › "Show getting started" shows them again at any time.
Creating a project
A project groups the drawings of a building: one drawing per storey and trade, with the others shown as references. The project wizard leads you to a finished project in seven steps.
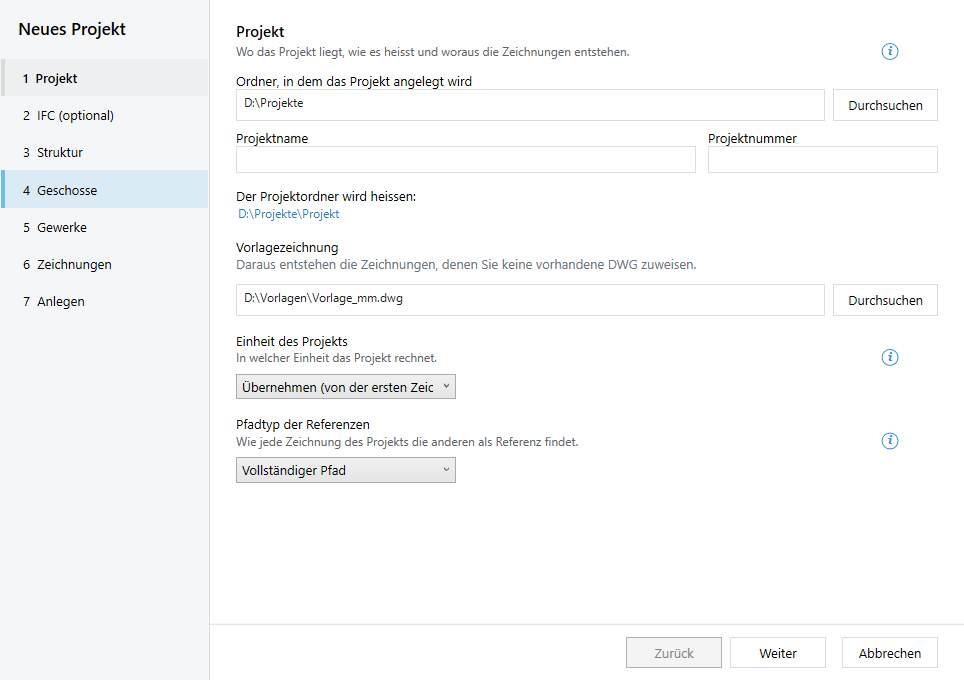
The steps on the left (1) take you through the project in order:
- Project – folder (2), project name and number, template drawing (3), unit and path type of the references.
- IFC (optional) – an architectural model as the basis; whatever the IFC suggests only goes into empty fields.
- Structure, Storeys, Trades – which drawings are created; storeys with their levels (top of slab, underside of slab, finished floor, underside of ceiling).
- Drawings – assign existing plans.
- Create – LuaCAD creates the folders and drawings; the project then appears in the project panel.
Existing plans come into the project with Import drawing. You set the origin and check the scale (alignment) so that all storeys sit exactly on top of each other.
LuaCAD settings
The LuaCAD settings apply to all modules: LuaCAD tab › Info › LuaCAD settings, or in any panel gear › "LuaCAD settings …".
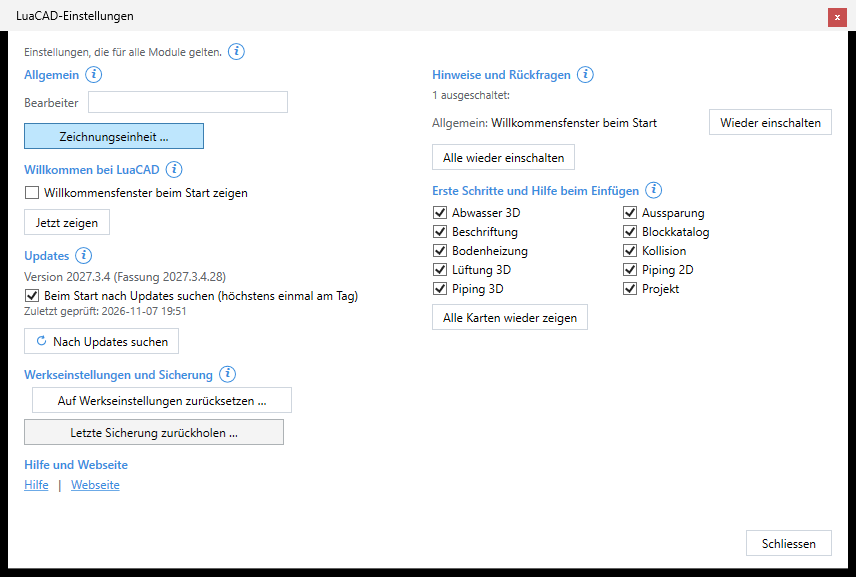
- Designer – the name shown in isometrics, lists, IFC and the clash list. Drawing unit – the unit in which new parts are created.
- Updates – at start LuaCAD silently checks at most once a day whether a new version is available.
- Notices and prompts – everything you switched off with "Don't show again" or "Remember answer" can be switched on again here, one by one.
- Getting started and insertion help – on or off per module; "Show all cards again" releases every card.
Factory settings and backup
Reset to factory settings first backs up your whole settings folder and then resets the areas you choose (module settings, media, templates, notices). Settings, media and templates take effect at the next start. Restore last backup brings the saved state back at the next start.
Updates
Check for updates (LuaCAD tab › Info, or in the settings) checks right away. Nothing is downloaded or installed – LuaCAD only tells you whether a new version is available.
Help in the program
Help comes to where you need it:

| Where | What |
|---|---|
| "i" of a panel page | What the page does; "More in the online help" opens the matching section. |
| "i" at the top of a dialog | What the dialog does, also with "More". |
| Insertion help | Before special workflows a window with a picture and steps; Online help shows the same workflow in more detail. |
| Action bar at the cursor | The Help chip opens the help for the running function – the function keeps running. |
| Gear › Help | The help of the module. |