
Inserting and connecting pipes
Inserting a pipe
A pipe is created point by point. If it starts or ends on an existing pipe, LuaCAD places the tee there automatically.
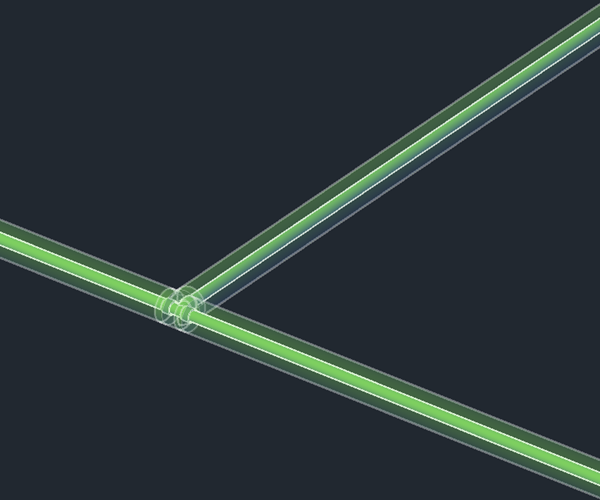
- On the Pipe page of the panel choose the medium, catalog, nominal size and installation level, then click Insert.
- Click the start (1): free, at the end of a pipe, or in the middle of a pipe – a branch is created there.
- Click further points. A click in the middle of another pipe (2) splits it and the tee goes there. Close to the free end of a pipe, the new pipe is connected instead of splitting it.
- Enter or Esc ends the run – the segments already placed stay.
Angle, height and distance
- The Space key switches between snap angle (grid from the panel, e.g. 45°) and free.
- A sets, before the first point, a distance to a reference point (e.g. 200 mm from a wall corner); during the run it sets the installation height and the wall distance.
- D types an angle, W picks it with two clicks – the angle grid follows.
- P takes all values of a pipe you click (medium, catalog, DN, height), N only its medium.
Route line or 3D right away
"Insert as" in the panel: route line draws only the axis; the pipes come with Generate 3D (Tools page). Generate 3D already shows every pipe at the cursor and places pipes, elbows and tees from the catalog while you draw.
Drawing a multi-pipe run
All pipes of the chosen riser template run in parallel – each in its own medium, with an elbow at every corner.
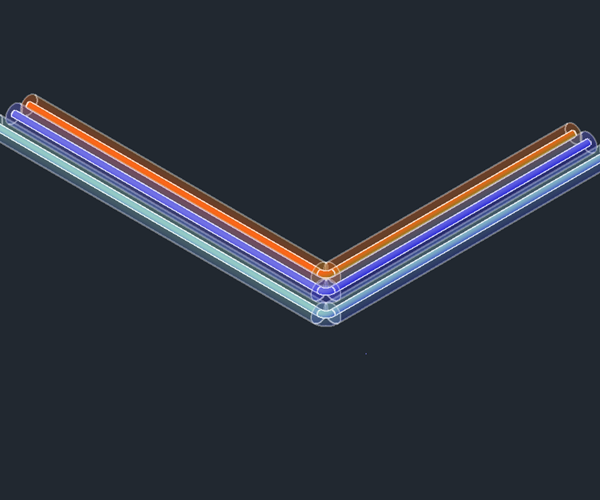
- On the Risers/connections page choose a riser template (for example cold water, hot water, circulation) and click Insert multi-pipe run.
- Click the start (1). At risers or at an existing multi-pipe run each pipe starts at the pipe of its medium, otherwise freely. Before that, P takes pipes from the drawing and E opens the riser template.
- Click the corners (2). S puts the pipes on the other side, A changes height and wall distance, the Space key switches between snap angle and free.
- If the run ends on an existing multi-pipe run (3), each pipe connects to the pipe of its medium. Enter or Esc ends the run.
Picking up pipes from a fixture
Before the first point, P takes the pipes from the drawing: draw a rectangle over existing pipes – or over a fixture or free connections. Each connection becomes a pipe with its medium, spacing and DN; catalog and material stay as set.
Connecting two pipes
Click two pipes – LuaCAD suggests the possible connections and you choose the right one.
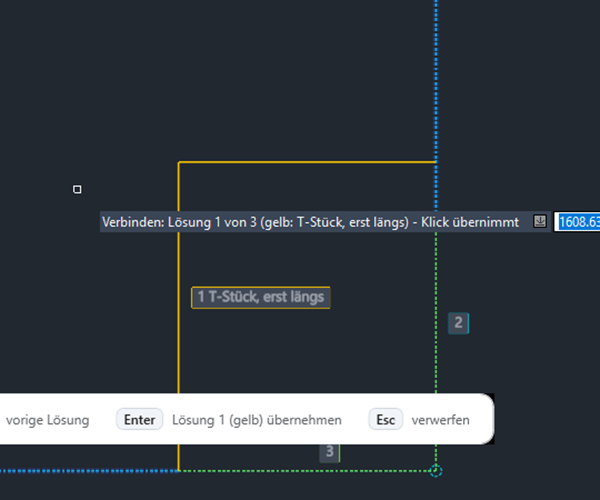
- Click Connect (Tools page) and click the first pipe (1). Several pipes at once: click next to them and drag a rectangle.
- Click the second pipe (2). In the middle of a pipe a tee is created, close to its end a corner.
- If there are several solutions, LuaCAD shows all of them in colour (3). Tab or arrow right/left switches; the yellow one is selected.
- A click or Enter accepts the yellow solution, Esc discards it. You can then connect the next pair right away.